How do I create an estimate?
Estimates are a simple way for your clients to pre-approve the basic scope and cost of a project. Typically sent to your clients before you do the actual work, estimates are ideal for quick jobs, as an add-on to an existing project, for follow-up work, or for formalizing a verbal agreement.
Let’s say you just had a phone call with your client and they’re interested in getting a quick cost estimate for a small project. The scope of this work doesn’t require a large, formal proposal. An estimate is the perfect fit.
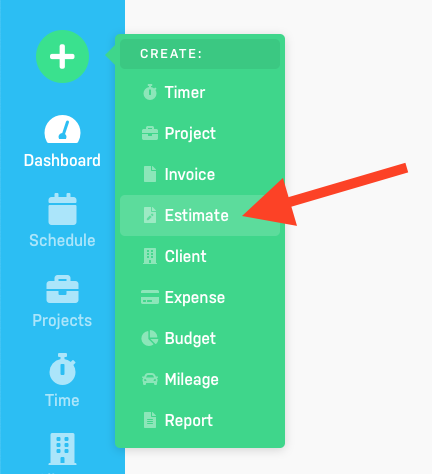
Creating an estimate is easy. Click on the green Create (+) menu in the top left of your screen and select Estimate:
You’ll now be presented with the New Estimate screen:
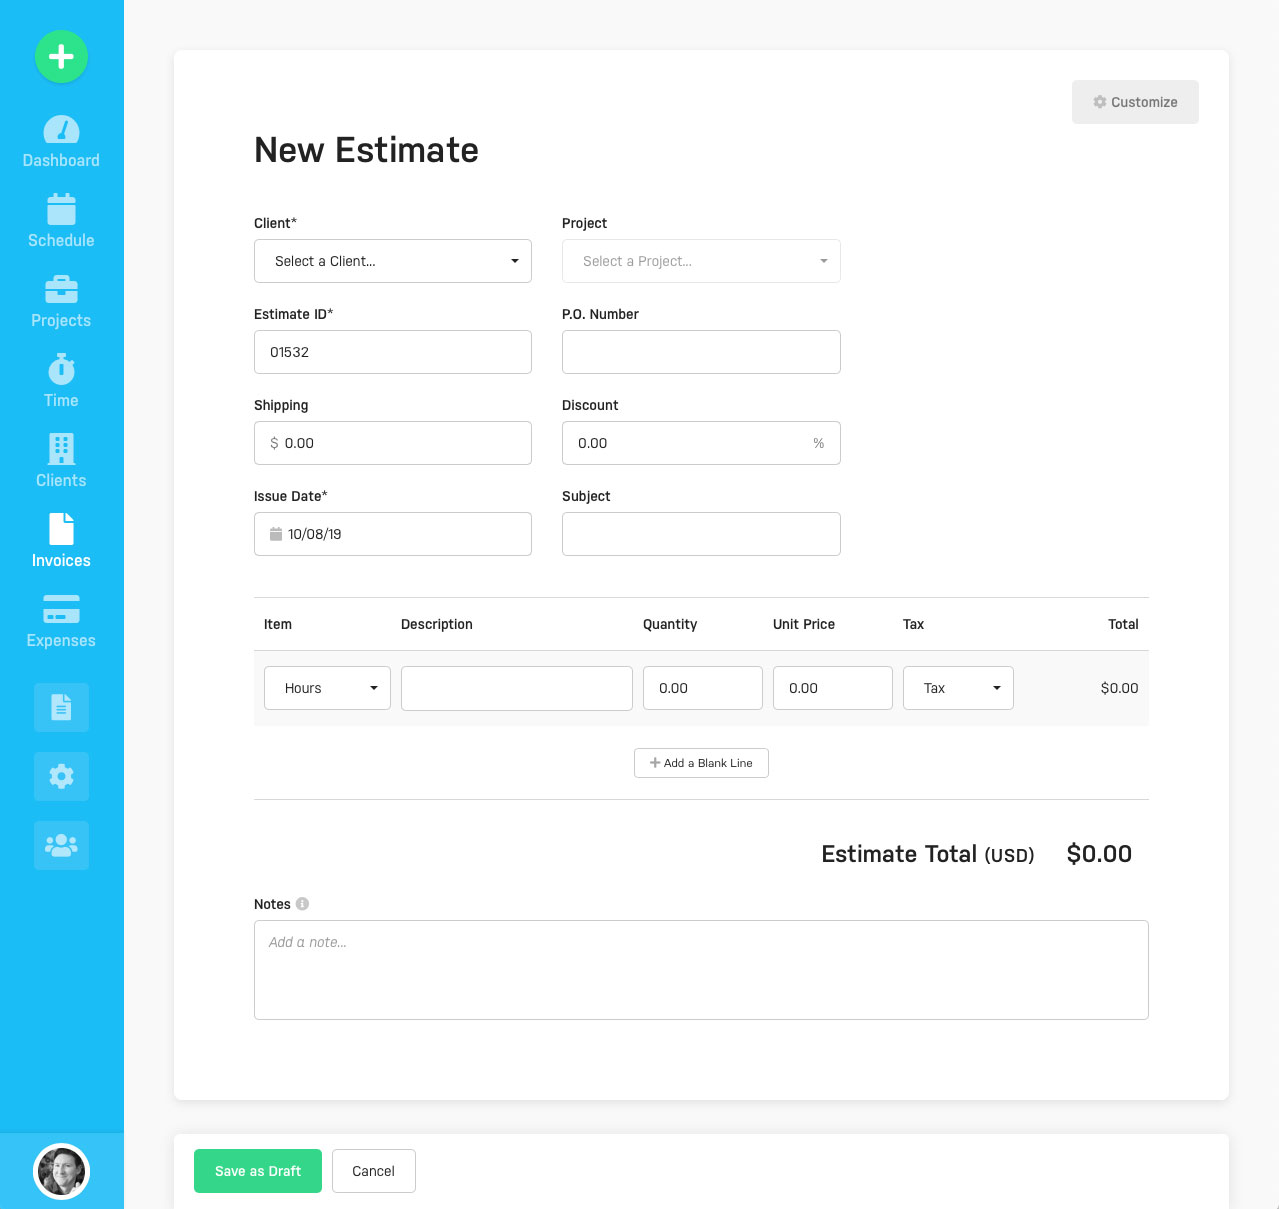
Start by filling out the form fields at the top of the New Estimate screen as follows:
- Client: Select a client for your estimate. You can also choose to create a new client on the fly by selecting Create New Client in the drop down menu.
- Project: If this estimate is associated with a project select that project here. You can also choose to create a new project on the fly by selecting Create New Project in the drop down menu.
- Estimate ID: This is a unique ID that can only be used once in your account. Harpoon will automatically increase the Estimate ID value by one for each subsequent estimate. For example, if you enter 00025 for your first estimate, Harpoon will automatically pre-fill 00026 as the ID for your second estimate. More information about invoice and estimate IDs can be found here.
- P.O. Number: If you need to associate the estimate with a purchase order number you can enter that here.
- Shipping: If there's a shipping cost associated with the estimate it can be included here.
- Discount: If you’d like to give your client a discount you can type in a percentage value here. The discount will be applied to the pre-tax subtotal of the estimate.
- Issue Date: This is pre-filled with the current date, but can be set to any date in the past or future as needed.
- Subject: This is displayed to your client on the estimate and comes in handy when you want to summarize the contents of an estimate for your client.
You can also customize/overwrite some of the estimate's default settings by clicking the "Customize" button in the upper right of the screen:
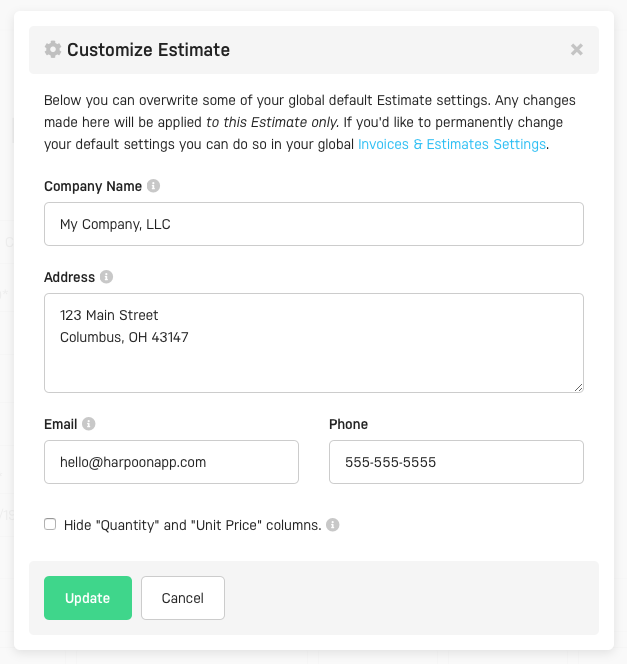
Any edits to these Customize Estimate fields will be applied to this estimate only. If you'd like permanently change your default estimate settings you can do so in your global Invoices & Estimates Settings.
You're now ready to create line items for the estimate:
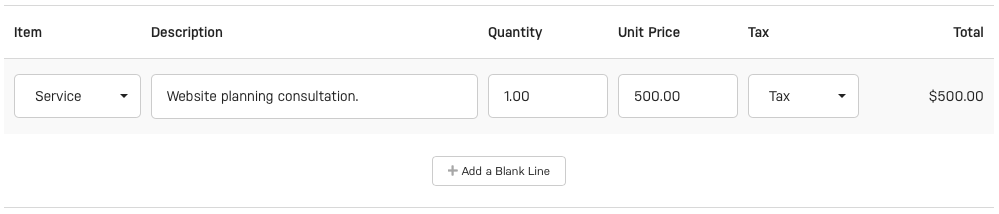
- Item: Select an item type (e.g. Service, Hours, Expense, Deposit, etc.) for the line item.
- Description: Provide a description for the line item. This will help your client understand exactly what they're being billed for.
- Quantity: How many of these items is your client being billed for?
- Unit Price: What is the price of each line item unit?
- Tax: If applicable, select one or more taxes to apply to the line item. Your available taxes can be set up via your Tax Settings screen.
- Line Item Total: The total amount of the line item.
Note: The Quantity and Unit Price columns can be hidden from your client via the Customize Estimate form. This comes in handy when the line item(s) on an estimate are fixed fee costs, not unit costs.
- Add a Blank Line: This adds a new, blank line item to the estimate.
- Notes: What you write in the Notes field will be visible to your client on the estimate.
When the estimate is ready click the Save as Draft button and you’ll be presented with the Estimate Details screen. Here you can take a variety of actions on the estimate, such as sending it to your client:
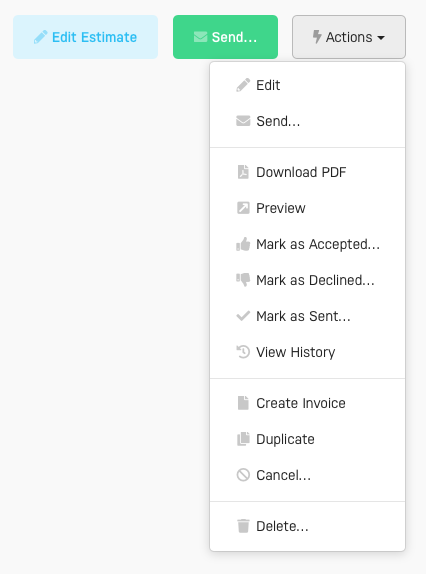
Tip: You can customize the design of your estimates (i.e. logo, branding color, etc.) via your Invoices & Estimates Settings screen.
When your client views the estimate online they’ll have the option of “accepting” the estimate.
If accepted the estimate will receive a new status of “Accepted” and Harpoon will notify you of the change in status. At this point you can use the “Create Invoice” action to create an invoice based on the accepted estimate to send to your client at the appropriate time, making it easy for them to provide payment.
To learn more about estimates view these support articles.