
How do I record an expense?
Not sure which one you're using? The new interface has a dark sidebar and /app/ in the web address; the classic interface has a bright blue sidebar. You can switch at any time: in the new interface, click your name (top right) and choose Switch back to classic; in the classic interface, hover your avatar (bottom left) and choose Try the new Harpoon.
When your business takes on an expense you should record the expense in Harpoon. This will allow you to keep accurate records for profit/loss and tax purposes. An example of an expense might be a new computer, paper for your office printer, or paying a contractor to help with a project.
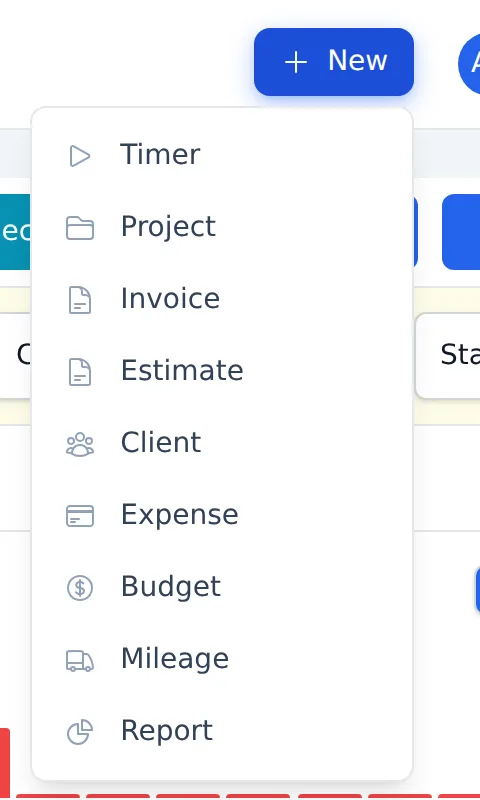
To create an expense click the blue New button in the upper right of your screen and select Expense. You can also click the Create New Expense button on your Expenses screen.
You’ll now be presented with the new expense form. Fill it out as follows:
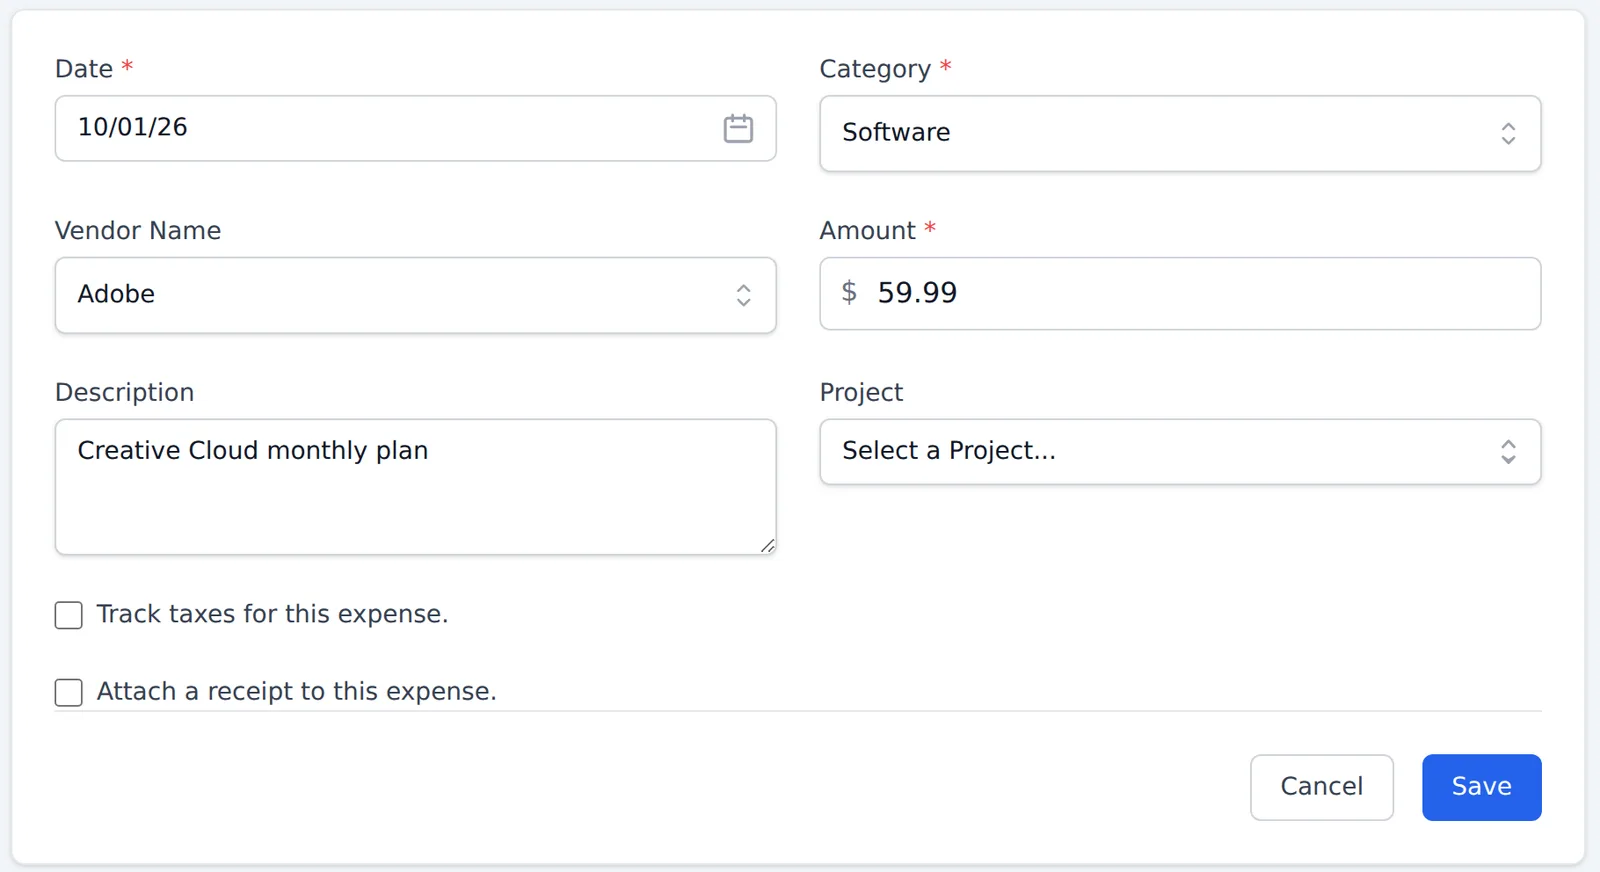
- Date: Date the expense was incurred.
- Category: Select a category that’s close to the way you’d categorize the expense for tax purposes. If you’re not sure which category is the best fit for a given expense ask your accountant. Note: You can customize your list of expense categories on your Expense Settings screen.
- Vendor Name: The name of the vendor from whom the expense was incurred. Pick a vendor you’ve used before, or type a new name. For example, for a new computer the vendor name might be “Apple.”
- Amount: How much was the expense?
- Description: Any other details you’d like to remember about the expense can be added here.
- Project: This is optional, but if you’d like to associate an expense with a project you can select it from the drop down menu. The expense will then be listed on the project’s details screen, and you can add it to an invoice for the project (using Add Recorded Expenses on the invoice form) to get reimbursed by your client. When you add it to an invoice, the expense is marked Billed automatically. Once you select a project a Status field appears, where the expense is marked Unbilled or Billed. Project expenses are also included in the project’s profit/loss figures.
- Track taxes for this expense.: Checking this option lets you record any taxes that were paid as part of the expense. These taxes are shown on your Tax Summary report. Learn more in How do I track taxes on my expenses?
- Attach a receipt to this expense.: Checking this option lets you upload an image or PDF of the receipt for the transaction.
Click Save and Harpoon will take you to the details screen for your new expense.
To learn more about Expenses and other related topics view the Expenses support articles.
When your business takes on an expense you should record the expense in Harpoon. This will allow you to keep accurate records for profit/loss and tax purposes. An example of an expense might be a new computer, or paper for your office printer, or paying a contractor to help with a project.
To create an expense click on the green Create (+) menu in the upper left of your screen and select Expense.
You’ll now be presented with the New Expense form.
Fill out the New Expense form as follows:
- Date: Date the expense was incurred.
- Category: Select a category that’s close to the way you’d categorize the expense for tax purposes. If you’re not sure what category is the best fit for a given expense ask your accountant. Note: You can customize your list of expense categories via your Expense Settings screen.
- Vendor Name: The name of the vendor from whom the expense was incurred. For example, for a new computer expense the vendor name might be “Apple.”
- Amount: How much was the expense?
- Project: This is optional, but if you’d like to associate an expense with a project you can do so by selecting a project from the drop down menu. Doing so will list the expense on the Project Details screen for the project, as well as allow you to add the expense to an invoice for the project in order to get reimbursed from your client. Project expenses will have a status of either “Billed” or “Unbilled” and also get calculated into a project’s profit/loss metrics.
- Description: Any other details you’d like to remember about the expense can be added here.
- Track Taxes: Checking this option will allow you to track any taxes that were paid as part of the expense transaction. These taxes will then be shown on your Tax Summary report.
- Attach a Receipt: This allows you to attach an image of a receipt for the transaction.
To learn more about Expenses and other related topics (e.g. Retainers) view the Expenses support articles.