
How do I track time for a project?
Not sure which one you're using? The new interface has a dark sidebar and /app/ in the web address; the classic interface has a bright blue sidebar. You can switch at any time: in the new interface, click your name (top right) and choose Switch back to classic; in the classic interface, hover your avatar (bottom left) and choose Try the new Harpoon.
You can track time with Harpoon's timers, or add your hours manually.
Timers
Go to Time in the left sidebar and choose Timers (or go straight to your Timers page). Use an existing timer, or click Create New Timer to add a blank one at the top of the list.
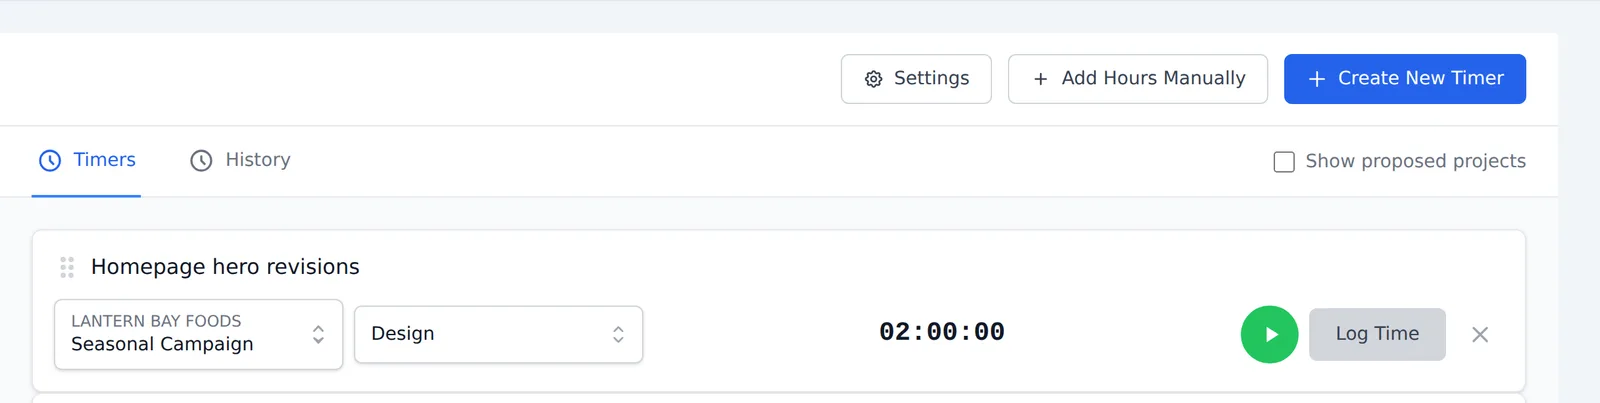
Each timer has:
- Description: click Add a description... and type a short note about what you're working on.
- Project: the project you're working on. Your time is recorded against this project. Projects are grouped by client, and you can type to search.
- Task: the kind of work you're doing. You can customize these tasks in your Time Tracking Settings.
- Time: counts up while the timer runs. When the timer is paused, you can click the time and type a different amount (hh:mm:ss).
- Start/pause button: the green button starts the timer. While it runs, the button turns red; click it to pause.
When you're ready to record your time, pause the timer and click Log Time. Your hours are saved and the timer is removed from the list. To throw a timer away without logging it, click the × at the end of its row.
You can have several timers on the page at once, which is handy when you switch between projects or tasks during the day. Drag a timer by the dotted handle next to its description to reorder them.
Proposed projects don't appear in the timers' project list unless you check Show proposed projects at the top right of the page. Completed, Canceled and Archived projects don't appear there at all.
Adding hours manually
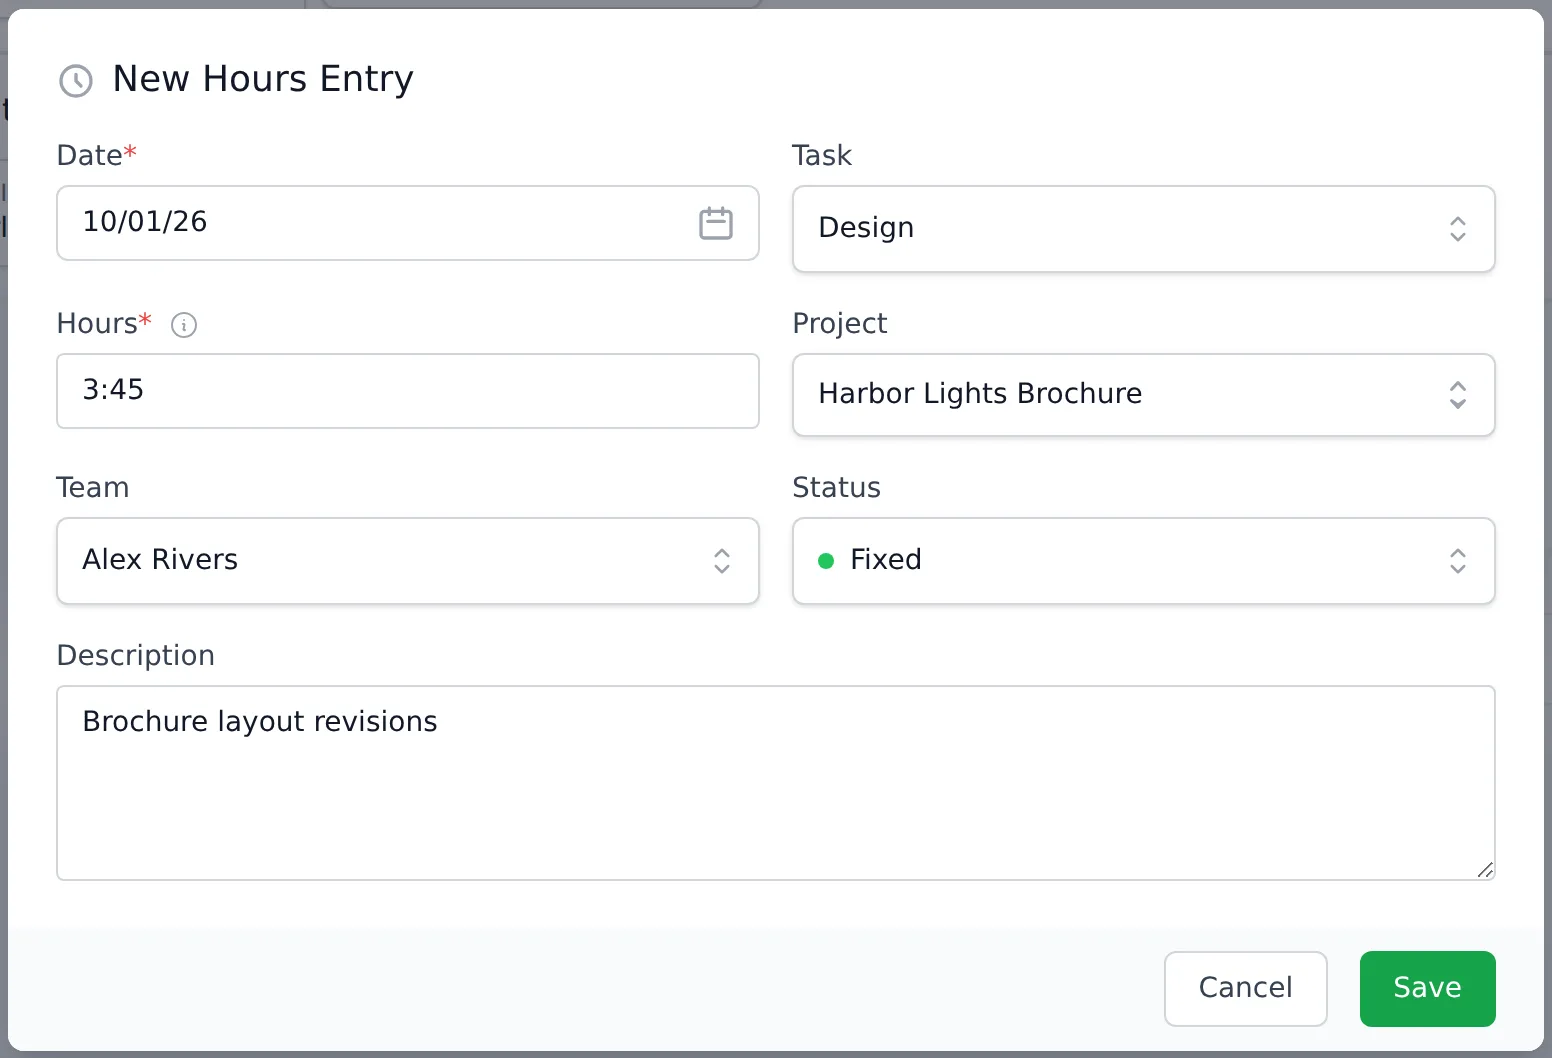
To skip the timer and record hours directly, click Add Hours Manually at the top of the Timers or History page. (A project's page has an Add Hours Manually button on its Hours tab too.)
In the New Hours Entry window, fill in the Date, Hours (as a decimal such as 3.75, or as hours and minutes such as 3:45), and optionally the Task, Project, Team member, Status and Description. Then click Save.
Time-tracking history
To see the hours you've logged, choose Time and then History in the sidebar, or click the History tab on the Timers page. The History page is where you view, filter and edit all of your account's recorded hours. Filter by date range, Client, Project, Task, Team or Status, then click Apply. Use the ⋮ menu on any entry to edit, duplicate or delete it.
To learn more, see the Time Tracking articles.
You can track time for your projects by using Harpoon’s timers, or by manually adding your hours to Harpoon. First let's cover how to use a timer.
Timers
You can manage time-tracking timers by visiting your Timers screen. Here you can start using an existing timer, or create a new blank timer by clicking the "Create New Timer" button in the upper right of the screen.

You can use a timer as follows:
- Description: Provide a short description of what you're working on.
- Project: Select the project that you're working on. This will cause your tracked time to be associated with this project.
- Task: Select the task category you’re working on for this project. These task categories can be customized on your Time Tracking Settings screen.
- Ticker: If the timer is running this field will automatically update with the current amount of time tracked. Or you can click on the ticker to manually type in an amount of hours (the timer must be paused to do this).
- Start/Pause: This button allows you to start and pause the timer.
Once you're ready to log your tracked time make sure the timer is paused and click the Log Time button on the timer. The timer will give an indication that your tracked time has been logged. The timer will be cleared out and can be used again.
Note: You can have multiple timers on the screen at the same time. This is handy for when you jump between multiple projects and/or tasks throughout the day.
Adding Hours Manually
If you'd like to bypass using a timer and just want to record your hours manually you can use the "Add Hours Manually" button in the upper right of your Timers or Time-Tracking History screens. This will provide a quick entry form for manually recording your hours:

Time-Tracking History
To view a history of your logged time-tracking entries you can view your Time-Tracking History screen. Your Time-Tracking History screen is where you can view, filter, edit, and organize all of your account's recorded hours entries.
Note: Mac users can also use Harpoon for Mac, a desktop menubar version of Harpoon's timers.
To learn more about the details of time-tracking view the Time-Tracking support articles.